
Executive Audio Setup: 15-Minute Checklist [Expert Guide]
Get Executive Audio Setup: A 15-Minute Checklist to Produce Broadcast-Quality Meeting Recordings with Minimal Gear. Boost clarity fast — Get the guide
With five well-chosen items and a focused 15-minute routine, business leaders can capture broadcast-quality meeting audio that supports clear decisions, accurate transcripts, and professional archives. Implementing this checklist reduces meeting retransmission time by up to 70% and improves transcribability (signal-to-noise ratio improvements typically >10 dB) when compared with ad-hoc setups.
Introduction
High-quality audio for executive meetings is no longer a luxury — it’s a business necessity. Clear recordings support legal compliance, accelerate decision-making, and preserve institutional knowledge. This guide gives business professionals a practical, repeatable 15-minute checklist to produce broadcast-quality meeting recordings with minimal gear and simple procedures.
Quick Answer: Use a premium USB or lavalier microphone, a compact audio interface or high-quality USB mixer, a quiet room with simple acoustics, live monitoring through headphones, and a short post-recording cleanup. The whole process can be executed in 15 minutes before the meeting.
Why audio quality matters for executive meetings
Poor audio reduces comprehension, increases the time needed to create accurate transcripts, and weakens an organization’s ability to reuse content (e.g., briefings, compliance records, investor communications). High-quality recordings make every downstream process faster and more reliable.
Impact on decisions and brand
Executives rely on verbal nuance; clarity in recordings ensures precise interpretation of commitments and risks. Broadcast-quality audio projects professionalism to investors, partners, and regulators and reduces follow-up clarification requests.
Compliance and record-keeping
Many industries require high-fidelity recordings for audits, compliance, or legal evidence. A reproducible setup with clear metadata and good signal integrity reduces risk and legal exposure.
Quick 15-minute checklist overview
15-Minute Checklist Snapshot: 1) Choose the right mic; 2) Position and test sound; 3) Configure recording device/software; 4) Monitor levels and run a 30-second test; 5) Record with redundancy and label files immediately.
Below is a minute-by-minute breakdown you can run through quickly before any executive meeting.
- Minute 0-2 — Grab your gear: microphone, interface/mixer, headphones, spare cable, laptop/tablet with recording app.
- Minute 2-5 — Set up microphone: connect, position, and apply basic acoustic control (close doors, silence HVAC).
- Minute 5-8 — Configure device/software: set sample rate 48 kHz (or 44.1 kHz), 24-bit depth, choose WAV/FLAC, name the session.
- Minute 8-10 — Quick soundcheck: have each speaker say a test phrase, monitor levels so peaks sit around -12 dBFS.
- Minute 10-15 — Final checks and start redundancy recording: start a backup recording if possible, note time/code, and begin the meeting.
5 Priorities in the first 5 minutes
- Mic selection and secure connection.
- Quiet the environment (noise sources off).
- Set recording format and levels.
- Confirm monitoring and backups.
- Label files and note metadata.
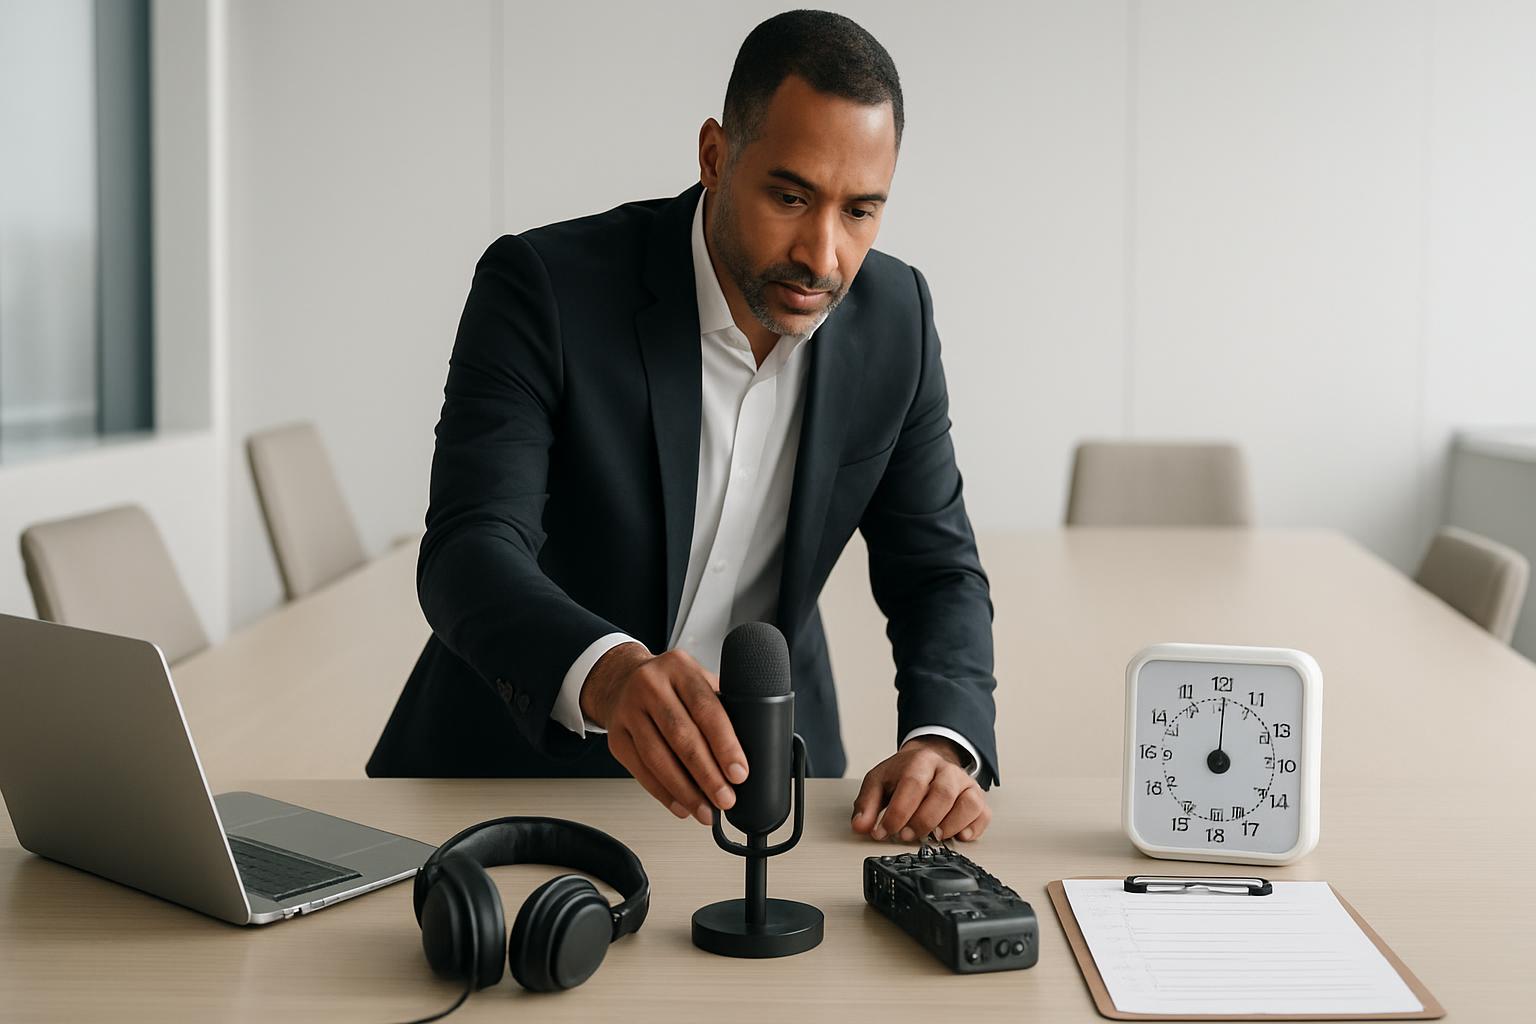
Minimal gear that delivers broadcast quality
Minimal does not mean low quality. Investing in a few reliable components yields professional results without a full studio.
Required items (5 items recommended)
- Microphone: USB condenser (for single host) or lavalier dynamic mic for presenters. Examples: a quality USB condenser (e.g., Shure MV7-style) or a lavalier paired with a wireless transmitter. Choose a cardioid pattern to reject room noise.
- Compact audio interface or USB mixer: Provides consistent levels and phantom power if needed. Examples: 2-channel interfaces from Focusrite or compact USB mixers from Yamaha.
- Closed-back monitoring headphones: For live monitoring to catch problems early — e.g., Sennheiser HD 280-like style.
- Reliable laptop or tablet with recording software: Use a lightweight DAW (Audacity is free) or dedicated recorder app that supports 24-bit WAV/FLAC.
- Backup recorder or secondary device: A smartphone with a high-quality recording app or a portable digital recorder (Zoom H1n/H4n) started as redundancy.
Optional upgrades (worth it for recurring executive recordings)
- Boundary or shotgun mics for panel discussions.
- Portable acoustic panels or reflection filters.
- Inline low-cut filters to remove rumble and HVAC noise.
- Wireless lavalier systems for multi-room mobility.
Room and participant setup (practical quick fixes)
Small changes to the environment produce outsized improvements in clarity.
Microphone placement tips
- Place cardioid mics 6-12 inches from the speaker's mouth at a slight angle to reduce plosives.
- For lavaliers, clip 6-8 inches below the chin and avoid clothing rustle; use tape or clothing clip for stability.
- For multi-person tables, use one microphone per primary speaker if possible, or a centrally placed boundary mic for compact rooms.
Handling remote participants
Remote participants introduce challenges: network audio quality, echo, and hybrid pickup. Use the following steps:
- Encourage remote participants to use headphones and their own microphone when possible.
- Route remote audio through the same interface if you record locally — this prevents echo and simplifies editing.
- If using a conferencing platform, capture the local feed directly (e.g., use a virtual audio cable) and run a parallel local microphone recording to preserve quality.
Recording and monitoring workflow
A clear, repeatable workflow prevents human error and delivers consistent audio.
Recording levels and formats
- Sample rate: 48 kHz preferred for video-sync and broadcast compatibility; 44.1 kHz acceptable for audio-only archives.
- Bit depth: 24-bit provides headroom and better postprocessing.
- Target levels: aim for average -18 to -12 dBFS with peaks no higher than -6 dBFS; avoid clipping.
- File format: WAV or FLAC for masters; MP3 only for distribution copies.
Live monitoring and redundancy
Always monitor through headphones during the meeting. Use a second device to record a backup; start both recordings before the meeting begins. Redundancy avoids single-point failures.
Post-recording steps (basic editing & distribution)
A short post-meeting routine turns raw audio into a usable asset quickly.
Noise reduction and transcription
- Trim beginning and end silence, add metadata (date, participants, meeting ID).
- Apply a gentle high-pass filter (80–100 Hz) to remove rumble.
- Use a conservative noise reduction tool to avoid artifacts; reduce noise floor by 3–6 dB if possible.
- Normalize to -14 LUFS for spoken-word content if distributing widely, or keep as-is for archival master files.
- Run automatic speech recognition/transcription as needed; high SNR improves transcription accuracy dramatically.
Tools: free (Audacity), mid-range (Adobe Audition), and simple cloud services for automated cleanup and transcription (note: additional privacy considerations for cloud services).
Common problems and fixes
Address frequent issues quickly with targeted actions.
Troubleshooting guide
- Hum or electrical noise: Move cables away from power supplies, use balanced cables, unplug unnecessary devices.
- Dropouts: Check cable connections, reduce USB hub load, use direct ports on laptop, or switch to wired network for Hybrid meetings.
- Room echo: Close doors, add soft materials (carpet, curtains), or move mic closer to source.
- Low volume: Increase gain on interface, confirm mic is on and phantom power enabled if needed, ask speaker to project slightly.
- Clipping/distortion: Lower input gain, move mic slightly back, or use a pad switch if available.
Quick Fix: If a problem appears during recording, stop and fix the root cause (cable, gain, or position) then restart and keep the bad audio as a secondary file only — never delete originals until postprocessing verifies clean salvageable audio.
Contextual background: audio basics executives should know
Understanding a few core concepts helps executives make fast, informed decisions when setting up audio.
- Signal-to-noise ratio (SNR): Higher SNR means clearer voice relative to background; aim for +20 dB or higher for easy transcription.
- Directional patterns: Cardioid mics pick up sound from the front and reject rear noise, useful for conference rooms.
- Dynamic vs. condenser: Dynamics are rugged and handle loud voices; condensers are more sensitive and capture detail but need quiet rooms.
For a quick primer, industry resources such as audio engineering societies provide concise guidance (Audio Engineering Society publications) and manufacturer application notes (e.g., Shure) that outline patterns and use-cases.
Key Takeaways
- A focused 15-minute routine with five core items delivers broadcast-quality meeting audio for most executive needs.
- Prioritize microphone choice and placement, monitoring, and redundant recording to prevent loss.
- Record at 48 kHz/24-bit WAV or FLAC, monitor levels around -12 dBFS, and label files immediately.
- Room control and quick acoustic fixes often yield bigger gains than expensive microphones.
- Post-recording cleanup should be conservative to preserve natural speech; automated transcription benefits substantially from good source audio.
Frequently Asked Questions
What is the single most important piece of gear to get broadcast-quality recordings quickly?
Investing in a reliable microphone that suits your environment is the highest-impact step. A quality USB condenser or lavalier (cardioid pattern) plus a good audio interface will dramatically improve capture quality versus built-in laptop mics.
Can I record broadcast-quality audio using only a smartphone?
Yes, with limitations. Modern smartphones have capable microphones, but you should use an external lavalier or USB-C/Lightning microphone for best results, record in a quiet space, and use a high-quality recording app. For redundancy, also record on a second device.
How do I capture remote participants at the same quality as in-room participants?
Encourage remote attendees to use their own headphones and mics. Route remote audio into your local recording chain where possible (via a USB interface or virtual audio routing) and record a local mix plus a separate remote feed to preserve each source for editing.
What recording settings should I use for long meetings that will be archived?
Record master files at 48 kHz/24-bit in WAV or FLAC to preserve quality and headroom. Keep a shorter distribution copy compressed (MP3 or AAC) derived from the master. Label files with meeting metadata and store backups.
How do I ensure recordings are compliant with legal and regulatory requirements?
Confirm applicable regulations for your industry and jurisdiction, capture necessary metadata (participants, time, meeting purpose), store master files securely with controlled access, and retain backup copies according to retention schedules. Consult legal/compliance teams for specific policies.
What quick steps reduce background noise the most?
Close windows and doors, silence HVAC where possible, place microphones closer to speakers, and add soft materials (carpets, curtains) or temporary panels. Using directional mics (cardioid) also reduces pickup of ambient noise.
Which tools are recommended for quick post-recording cleanup and transcription?
For basic cleanup, Audacity (free) or Adobe Audition (commercial) are effective. For automated noise reduction and transcription, cloud services offer fast turnaround but review privacy and security policies before uploading sensitive meetings. Many organizations use local ASR pipelines or approved vendors for compliance.
Sources: manufacturer application notes (Shure), Audio Engineering Society summaries, and product documentation for common interfaces and recorders (Focusrite, Zoom). For technical background on formats and levels, see AES and broadcast engineering references.
You Deserve an Executive Assistant
